Locating a vacuum leak in a car involves a few simple steps. Start by listening for hissing sounds and inspecting hoses for damage.
Identifying and fixing these leaks can improve engine performance and fuel efficiency. Vacuum leaks can disrupt your car’s engine, causing poor performance and higher fuel consumption. These leaks are often caused by damaged or disconnected hoses and can be tricky to pinpoint.
Listening for unusual sounds like hissing or whistling can help locate the leak. A visual inspection is also crucial, checking hoses and connections for any signs of wear or cracks. Addressing these issues not only enhances the vehicle’s performance but also prevents further engine trouble. In the following sections, we will guide you through simple steps to find and fix vacuum leaks in your car.
Identifying Symptoms
Finding a vacuum leak in a car can be tricky. Identifying symptoms early can save time and money. A vacuum leak can cause various noticeable symptoms in your vehicle. Understanding these symptoms helps pinpoint the issue.
Unusual Engine Behavior
An engine running rough? It might be a vacuum leak. Listen for hissing sounds from the engine. This sound often indicates escaping air. An engine idle that feels uneven? Another sign of a leak. The Check Engine Light may also turn on. This is a common warning sign.
Fuel Efficiency Drop
Notice a drop in fuel efficiency? A vacuum leak might be the cause. The engine works harder with a vacuum leak. This increases fuel consumption. You may find yourself refueling more often. Keep track of your mileage. A sudden decrease suggests a possible vacuum leak.

Credit: www.wikihow.com
Preparing For Inspection
Finding a vacuum leak in a car involves checking hoses and connections. Listen for hissing sounds near the engine. Use a smoke machine or soapy water to spot escaping air.
Finding a vacuum leak in your car might seem daunting, but with the right preparation, you can tackle this task like a pro. Before diving into the inspection, it’s crucial to set the stage for success. Proper preparation not only streamlines the process but also ensures your safety and efficiency. Are you ready to roll up your sleeves and get started? Here’s how you can prepare for a thorough vacuum leak inspection.
Gathering Tools
First things first, collect all the necessary tools. You don’t need a fancy mechanic’s toolkit; just a few essentials will do the trick. A simple spray bottle filled with soapy water is a must-have. It helps pinpoint the exact location of the leak.
A vacuum gauge is another valuable tool. It measures the vacuum pressure and can indicate a leak when the readings are off. Add a flashlight to the mix, which can be a lifesaver when inspecting those hard-to-reach areas under the hood.
Consider having a vacuum hose diagram specific to your vehicle. It provides a roadmap to follow, making your search more systematic. You’ll save time and avoid the frustration of searching blindly.
Safety Precautions
Before you start, pause and think about safety. Working on a car involves risks, but a few simple precautions can keep you out of harm’s way. Always ensure your car is on a flat surface and the engine is cool. Heat can cause burns, and nobody wants to deal with that.
Wear protective gloves and goggles. These might seem like overkill, but they protect your hands and eyes from unexpected splashes and sharp objects.
Be mindful of electrical components. Keep water and tools away from them to prevent shorts. Have you ever had your car battery spark unexpectedly? It’s not fun and can be dangerous.
Take a moment to disconnect the battery. This prevents accidental electric shocks and gives you peace of mind while you work.
As you prepare for inspection, remember that small steps can make a big difference. Proper tools and safety measures set the foundation for a successful leak detection. What are your experiences with car maintenance? Share your stories and tips below!
Visual Inspection
Identifying a vacuum leak early can save time and money. A visual inspection is a straightforward method. It helps you spot visible damage. This step requires no special tools. Just a keen eye and attention to detail. Begin by checking the engine’s components. Focus on areas where leaks are common. Look for cracks, loose connections, or worn-out parts. These are signs of potential leaks.
Checking Hoses And Connections
Start by examining all hoses. They should be free of cracks and splits. Look closely at connections. Ensure they are secure and intact. Loose or disconnected hoses often cause leaks. Use your hands to feel for any air escaping. Pay special attention to the ends of the hoses. They are prone to wear and tear. A simple replacement can fix many issues.
Inspecting The Intake Manifold
The intake manifold is another common leak source. Carefully inspect it for visible cracks or damage. Listen for hissing sounds around the manifold. This could indicate a leak. A flashlight can help you see better in dark spaces. Check the manifold gasket for wear. Gaskets seal the manifold to the engine. A damaged gasket often leads to leaks. Replace the gasket if it shows signs of wear.

Credit: www.youtube.com
Using Smoke Test
Detecting a vacuum leak in a car becomes straightforward with a smoke test. This method releases smoke into the vacuum system, revealing any leaks as smoke escapes from faulty areas. It’s an efficient way to pinpoint issues quickly.
Finding a vacuum leak in a car can be challenging. Using a smoke test can make the process easier. This method helps identify leaks by using smoke. The smoke is introduced into the vacuum system. It escapes through any leaks, making them visible. This is a quick and effective method. Let’s explore how to use a smoke test to find a vacuum leak.
Setting Up The Smoke Machine
First, ensure the car is parked safely. Engage the parking brake. Open the hood and locate the vacuum system. Attach the smoke machine’s nozzle to the system. Make sure it’s secure. Turn on the smoke machine. Wait a moment for the smoke to fill the system. Keep an eye on the connections. Ensure no smoke escapes from the machine’s attachments.
Interpreting Smoke Patterns
Watch for smoke escaping from the vacuum lines. This indicates a leak. Pay attention to the areas around the intake manifold. Look at the hoses and connections. Smoke may escape in small wisps or larger clouds. Small wisps indicate tiny leaks. Larger clouds show significant leaks. Note the location of the escaping smoke. This helps pinpoint the exact source of the problem. Fix the identified leak to restore the vacuum system’s efficiency.
Performing A Soap And Water Test
Detecting a vacuum leak in a car involves a simple soap and water test. Apply a mixture to suspected leak areas. Watch for bubbles indicating escaping air.
Performing a Soap and Water Test is a simple way to find vacuum leaks. This method is cost-effective and easy to do at home. Soap and water help reveal leaks by bubbling up when air escapes. This visual clue helps pinpoint the exact location of a leak. Here’s how to carry out this test efficiently:
Mixing The Solution
Start by gathering a spray bottle and liquid soap. Mix the soap with water in the bottle. Use a ratio of one part soap to three parts water. Shake the bottle gently to combine the ingredients. This creates a bubbly solution perfect for detecting leaks. Test the spray to ensure it produces a light mist.
Applying To Suspected Areas
Identify areas that might have vacuum leaks. Common spots include hoses, connections, and seals. Spray the solution on these areas thoroughly. Watch closely for bubbles forming. Bubbles indicate air escaping, which means a leak is present. Mark the spots where bubbles appear for repair.
Credit: www.youtube.com
Listening For Hissing Sounds
Listening for hissing sounds is crucial in locating a vacuum leak in a car. These sounds often signal escaping air, indicating potential leaks in hoses or seals. Identifying these noises can lead to a quick and efficient repair, ensuring optimal vehicle performance.
Listening for hissing sounds is a crucial step in diagnosing a vacuum leak in your car. When air escapes from a compromised vacuum line, it creates a distinct hissing noise. Paying attention to these sounds can save you time and money on repairs.
Have you ever wondered how mechanics zero in on these elusive hissing noises?
###
Using A Stethoscope
A mechanic’s stethoscope can be your best friend when tracking down a vacuum leak. It’s not just for doctors—this tool amplifies sounds, helping you pinpoint the location of the leak.
Hold the stethoscope close to different parts of the engine while the car is running. Listen carefully for that characteristic hissing sound.
If you don’t have a mechanic’s stethoscope, a long screwdriver can work in a pinch. Place the handle against your ear and touch the tip to various engine components.
###
Locating The Source
Once you’ve identified the general area, it’s time to get precise. Move the stethoscope or screwdriver slowly around hoses, gaskets, and seals.
Pay special attention to areas where vacuum hoses connect, as these are common leak points.
If you’re still struggling to find the exact spot, consider using a smoke machine. It releases harmless smoke into the vacuum system, which will escape visibly through any leaks.
Have you tried different methods to find a vacuum leak? Which worked best for you?
Remember, patience and a keen ear are your greatest allies in this task.
Utilizing Diagnostic Tools
Detecting a vacuum leak in your car can be tricky. Diagnostic tools make this task easier. They provide precise information. These tools help you pinpoint the problem quickly. By using them, you save time and effort. Two essential tools are the OBD-II scanner and the pressure gauge. Let’s explore how they work.
Obd-ii Scanner Insights
An OBD-II scanner is a valuable tool for car diagnostics. It connects to your car’s onboard computer system. This scanner reads error codes. These codes point to specific problems. For vacuum leaks, look for codes related to fuel mixture or airflow. Reading these codes helps identify the leak’s source. You can then address the issue effectively.
Pressure Gauge Readings
A pressure gauge measures the vacuum levels in your engine. This tool gives accurate readings. Low pressure readings indicate a possible leak. Connect the gauge to a vacuum line. Observe the pressure levels. Consistent low pressure suggests a leak. Fixing these leaks improves engine performance. This tool is simple yet effective. It helps maintain your car’s efficiency.
Addressing Found Leaks
Finding a vacuum leak in your car is only half the battle. Once you’ve identified the culprits, it’s time to tackle them head-on. Addressing found leaks promptly is crucial to ensuring your car runs smoothly. A small leak can lead to bigger issues, like poor fuel efficiency and engine performance. So, how do you go about addressing these leaks? Let’s delve into the steps you need to take, from repairing or replacing components to testing post-repair.
Repairing Or Replacing Components
Once you have pinpointed the source of the leak, the next logical step is to repair or replace the faulty component. This could involve tightening loose hoses, sealing cracks, or swapping out damaged gaskets. Each component demands a different approach, and knowing which one to apply is key.
Think about a time when you fixed something on your car. Was it exhilarating to see it come back to life? That’s the kind of satisfaction you can expect from fixing a vacuum leak. However, ensure you follow the manufacturer’s guidelines for replacements or repairs to avoid any mishaps.
Sometimes, replacing the entire component might be more economical than a temporary fix. If a hose is brittle or a gasket is severely cracked, replacement might be the wisest choice. Would you patch up a worn-out tire or simply get a new one? Apply the same logic here.
Testing Post-repair
After repairs, testing is vital. You need to ensure that the leak is truly sealed and your car is back to optimal performance. Conduct a thorough check by listening for any hissing sounds or using a smoke machine to verify the integrity of the repairs.
Have you ever felt the joy of hearing your engine purr perfectly after a fix? That’s the moment of truth. If everything sounds and functions right, you’ve done a great job. If not, retrace your steps and see what might have been overlooked.
Post-repair testing is not just about satisfaction; it’s about safety and efficiency. A properly sealed vacuum ensures your engine runs smoothly and efficiently. So, ask yourself, can you afford to skip this step and risk further damage?
Frequently Asked Questions
What’s The Easiest Way To Find A Vacuum Leak On A Car?
Use a smoke machine to detect vacuum leaks easily. It releases smoke into the system, revealing leak locations. Spray soapy water on suspect areas; bubbles indicate leaks. Listen for hissing sounds around the engine. Inspect hoses and connections visually for any cracks or loose fittings.
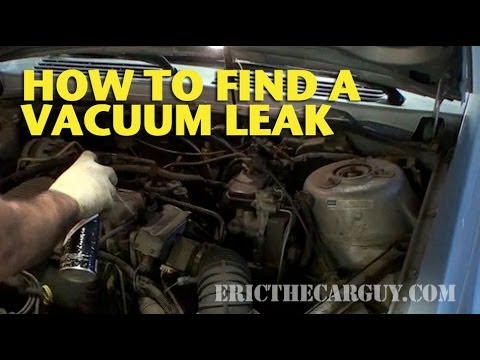
What Can I Spray On My Engine To Find A Vacuum Leak?
Spray carburetor cleaner on the engine’s vacuum lines to detect leaks. The cleaner causes the engine RPM to change when it finds a leak. Ensure the engine is running when you spray, and listen for changes in sound or performance.
This method is effective and straightforward for finding vacuum leaks.
Can You Use Wd-40 To Find A Vacuum Leak?
Yes, you can use WD-40 to find a vacuum leak. Spray it around suspected areas. Listen for changes in engine idle. This indicates a leak. Always use caution and ensure proper ventilation.
How To Find A Vacuum Leak Without A Smoke Machine?
Use a soapy water spray to find vacuum leaks. Spray around hoses and connections. Bubbles indicate a leak. Listen for hissing sounds near potential leak areas. Use a propane torch (unlit) to detect changes in engine idle speed, indicating a leak.
Inspect hoses visually for cracks or damage.
Conclusion
Finding a vacuum leak in your car isn’t hard. Follow the steps above. Listen closely for unusual sounds. Use smoke or soapy water to spot leaks. Regular checks help your car run smoothly. Don’t ignore warning signs. They can lead to bigger issues.
A small leak today might mean costly repairs later. Keep your car in top shape. Save time and money by acting early. Remember, maintaining your vehicle ensures safety and efficiency. Happy driving, and keep your car in great condition!